Using this site: Pro-tips

The software this forum uses can do quite a lot, but its capabilities aren’t always obvious. Here’s a list of advanced tips for various scenarios…

I want to…

Send a private group message to a number of Restarters

  1. Navigate to your inbox by clicking on your profile picture in the top right and then on the envelope icon that appears just below it
    Find-inbox

  2. Click on the ‘New Message’ button on the top left of your inbox. This will display a ‘composer’ box where you can write your message.
    New-message

  3. In the ‘Add recipient’ field, you can add as many members as you like - just start typing their username and select each member as they appear.

  4. Type out your message and hit ‘Message’. You’ve now created a private, group message. You can always find it in your inbox.

:warning: Please consider the following before sending a private group message:

  • would your message would be better as an open discussion? Open discussions allow more people to contribute and tend to add more value to the overall community.
  • private messages are more likely to generate a notification email (this depends on each individual member’s settings), so can be useful for getting someone’s attention but can be ‘spammy’.

Create a collaborative post/document that anyone can edit

  1. Write your post/discussion and post it as normal.
  2. Once it’s posted, scroll to the bottom of your post and click the ellipsis button and then the spanner/wrench icon that appears to reveal more admin options. Click ‘Make Wiki’.
  3. Done! Your post is now editable by everyone who’s logged in (and can see it). Users can just click the ‘Edit’ button at the bottom right of the post.
  4. To review changes made to the post, look at the time stamp at the top right of the post. E.g.: timeStamp 
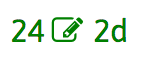
means there have been 24 edits, the latest of which was 2 days ago. Click on this to actually view the changes.

Add a table of contents to your post

You can build a table of contents by adding ‘anchors’ to headings in your post and then creating a list of links to those anchors.

See an example of this in action at the top of this discussion and in the Restart Party Kit (in English).

1. Add anchors to headings

  1. Add this code just before the headings you want to link to: <h1 id="heading--title1">
    (note: you should replace title1 with a word that describes the heading, e.g. intro - this should be different for every anchor you create.)

  2. And add this code just after it: </h1>

So, the headings you want to link to should look something like this:

<h1 id="heading--title1">Your first heading</h1>
<h1 id="heading--title2">Your second heading</h1>

This produces the following:

Your first heading

Your second heading

You can do the same for subheadings:
<h1> is the biggest heading (in terms of font size), but you can also use <h2> and <h3> tags for subheadings. E.g.:

<h2 id="heading--subtitle1">Your first subheading</h2>
<h3 id="heading--subtitle2">Your second subheading</h3>

Produces…

Your first subheading

Your second subheading

2. Create links to headings

You can link to a heading with an anchor (e.g. to build a table of contents) by formatting text as a link in the usual way, but instead of a URL, add the id of the anchor, such as #heading--title1.
E.g.:

1. [Your first heading](#heading--title1)
2. [Your second heading](#heading--title2)

This produces the following:

  1. Your first heading
  2. Your second heading

Use keyboard shortcuts to use and navigate this software

Most actions on Discourse have an assigned keyboard shortcut. Here’s the full list, which can also be accessed by typing ? at any time:

1 Like

Create a table

If you want to include a table in your post, you can do so by using the | symbol to differentiate columns and new lines for rows. The table will automatically format the width of each column based on your content.

For example, writing:

| Heading 1 | Heading 2 | Heading 3 |
| --- | --- | --- |
| Row 1 | content | content |
| Row 2 | content | content |

Produces:

Heading 1 Heading 2 Heading 3
Row 1 content content
Row 2 content content

Simply add new lines and | symbols to add more rows and columns.

:bulb: You can also include emoji in your table :wink:

1 Like